Mar 12
14
Once AD RMS is set up on the server, you need to set it up for the end users to actually use the AD RMS functionality. This is a 2-step process:
1. Install/validate RMS client on client machines
2. Use RMS within Office apps (Word, Excel, PowerPoint, and Outlook)
RMS client on client machines
The AD RMS client comes installed out-of-the-box on Microsoft end-user operating systems Vista, Windows 7, and Windows 8 as well as the server operating systems of Windows Server 2008 and Server 2008 R2. However, earlier versions of Windows (i.e. Windows XP or Windows Server 2003) require the manual installation of the RMS client. [Note: the client is actually just one file: msdrm.dll (Microsoft Digital Rights Management -dot – dynamic link library) which can be found in the %windir%/system32 directory.]
If you need to install the AD RMS client manually, first determine the operating system platform, the service pack installed (if any), and the architecture (32-bit or 64-bit) of the machine where you want the client installed, then visit the Microsoft AD RMS client page to download the correct AD RMS client version.
RMS in Office apps on client machines
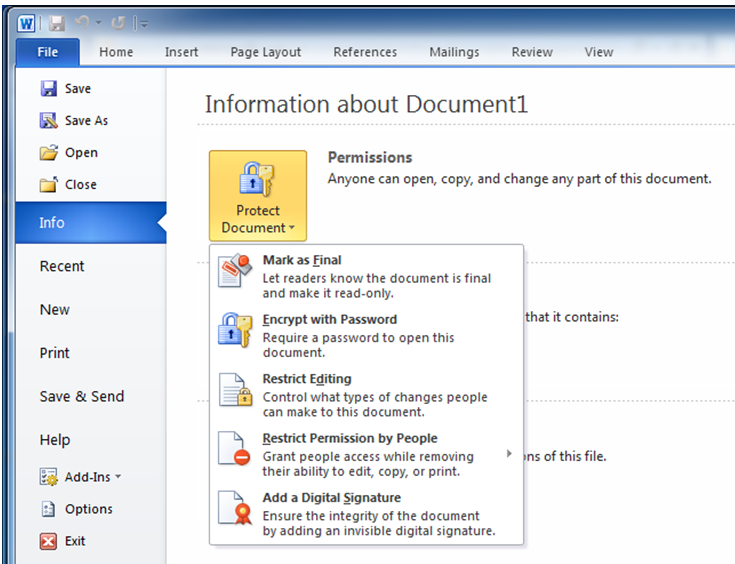
Once the proper RMS client is installed, you need to set up Office 2010 to use the RMS functionality. Microsoft has posted a helfpul article called Information Rights Management in Office 2010 that covers the process pretty well. Essentially, once RMS is set up, users simply need to click File, Info, and then select the restriction settings they want. Piece of cake. See below for Word 2010 Professional.
Additionally, if you would like to add a ribbon command for Protecting documents in Word 2010, it’s a fairly elaborate process, honestly. Check it out. Some of your users will prefer this method (the ribbon command) while others will prefer the “standard” way of clicking Info from the File menu. Either way, you’ll have covered both of your bases.
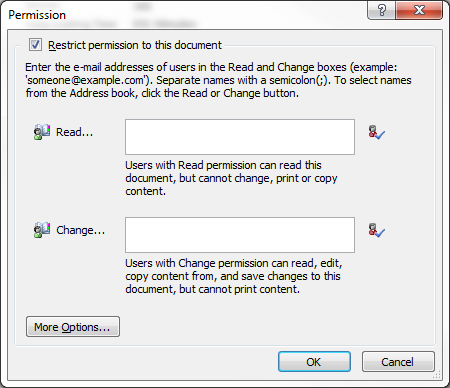
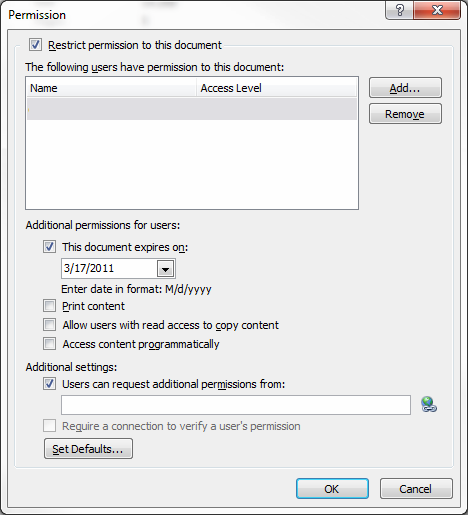
These instructions work for both Office 2010 and Office 2007 Professional versions, however, RMS will also work with Office 2003 Professional. For Office 2003 Professional the process is simply to click the File menu, and select Permissions from the dropdown. Then, simply follow the prompts. You will be prompted for which users and/or groups are to have access followed by a screen where you select the individual permissions to be restricted. See below. Piece of cake.
Final
After you have set up the client’s machines for the RMS client and you’ve set up Office 2010 to use RMS functionality, you’ll want to train the users on how to follow the process of protecting their documents, e-mails, spreadsheets, and powerpoints. At that point, you will have completed the AD RMS mission.


